Who This Guide Is For
This guide is written for:
- Adult children installing grab bars for an aging parent
- Caregivers with no fiberglass drilling experience
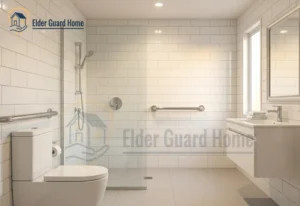
- Homeowners with fiberglass or acrylic shower units
- Anyone whose grab bar previously pulled out of a fiberglass wall
- DIYers who want to avoid cracking or flexing the shower wall
- Renters looking for a safe permanent or semi-permanent grab bar solution
Knowing how to install grab bars in fiberglass shower walls is one of the most misunderstood skills in senior home safety. Fiberglass is thin, flexible, and hollow-backed in most shower units — nothing like tile or drywall. The rules that work for tile installs fail completely on fiberglass. After 9 years and over 150 in-home safety assessments, I have seen more failed fiberglass grab bar installs than any other type.
The good news is that fiberglass installs work when done correctly. The backing plate makes all the difference. This guide walks you through every step, every mistake to avoid, and the one test that tells you the bar is safe before your parent ever touches it.
If you are also looking at the wider picture of bathroom fall prevention for your parent, that guide covers every layer from floor to lighting to grab bar placement.
Why Fiberglass Shower Grab Bar Installation Needs a Different Approach
Fiberglass shower walls are typically 3–5mm thick and backed by an air cavity. There is no solid material behind most of the wall to resist outward or downward pull. Standard toggle bolts without a backing plate grip only the thin fiberglass layer itself. Under a sudden fall load of 200 pounds or more, that thin layer flexes and the anchor tears straight through.
Flex cracking is the other major risk. When fiberglass bends under load, hairline cracks radiate out from the drill holes. Those cracks grow with every use and eventually cause the wall section around the bar to fail. This is why every method in this guide includes a backing plate. A properly installed backing plate spreads load across a much wider surface area and eliminates both pull-through and flex cracking.
If your shower has tile walls, see our separate guide to installing grab bars on tile without studs — the method is completely different. For fiberglass, follow every step below.
For bathroom fall statistics in seniors, see cdc.gov.
Fiberglass vs Acrylic — Know Your Shower Type
Many homeowners are not sure whether their shower is fiberglass or acrylic. Here is a simple way to tell. Press your thumb firmly against the wall away from any seam. Fiberglass flexes slightly and feels thinner. Acrylic is slightly thicker and more rigid, with a smoother, glossier surface finish.
| Feature | Fiberglass | Acrylic |
|---|---|---|
| Wall thickness | 3–5mm | 4–6mm |
| Surface feel | Slightly rough, matte finish | Smooth, high-gloss finish |
| Flex when pressed | Noticeable flex | Minimal flex |
| Installation approach | Backing plate required | Backing plate required |
| Crack risk without plate | High | Medium |
The installation approach is the same for both materials. If you are unsure which you have, treat it as fiberglass — that is the safer assumption and requires the stronger method.
3 Anchor Methods for Bathroom Safety Grab Bars for Seniors
Not all anchor methods are safe for fiberglass. Here is an honest comparison.
| Method | Weight Capacity | Best For | Flex Risk | Reversible |
|---|---|---|---|---|
| Backing Plate + Toggle Bolts | Up to 300 lbs | All fiberglass and acrylic showers | Very low | Yes |
| Snap Toggles + Backing Plate | Up to 265 lbs | Thinner fiberglass walls under 4mm | Very low | Yes |
| Adhesive Grab Bars | 50–75 lbs | Temporary light balance only | None | Yes |
Backing plate with toggle bolts is the gold standard for fiberglass shower grab bar installation. The plate sits flush against the inside wall surface and prevents the toggle from pulling through under load. This is the method most professional installers use.
Snap toggles with a backing plate are easier to install than standard wing toggles, especially in tight wall cavities. They hold slightly less weight but still exceed ADA requirements when paired with a proper backing plate.
Adhesive grab bars are not a real safety solution for full weight bearing. A 75-pound limit fails immediately under fall conditions. I recommend them only for very light balance assistance where no drilling is possible at all.
My recommendation for every family caregiver: use backing plate with toggle bolts. It is the only method I install in the homes I assess.
What Is a Shower Grab Bar Backing Plate and Why You Cannot Skip It
A backing plate is a rigid flat plate — typically steel or heavy plastic — that sits on the inside surface of the fiberglass wall behind the mounting point. When you tighten the toggle bolt, the plate presses flat against the inside wall face and spreads the load across its full surface area instead of concentrating it at the small bolt hole.
Without a backing plate, a 250-pound fall load focuses entirely on a hole the size of a drill bit. Fiberglass cannot resist that point load. The anchor tears through the wall. In homes I have visited after a failed install, the hole in the fiberglass is always larger after failure than before — the wall tore outward around the anchor.
The backing plate must be larger than the grab bar mounting flange. A 4×4 inch steel plate works for most standard grab bars. You can find backing plates at any hardware store or order them paired with grab bar installation kits online.
See our best shower bench for elderly guide for seating options that work alongside a properly installed grab bar.
ADA Grab Bar Placement Heights for Fiberglass Shower Safety
ADA placement standards apply regardless of shower surface material. Correct height protects your parent every single day.
| Bar Type | Height From Floor | Location |
|---|---|---|
| Horizontal bar | 33–36 inches | Along shower wall beside seat or standing area |
| Angled bar (45°) | Lower end 28 inches, upper end 38 inches | Beside shower entry or seat |
| Vertical bar | Bottom at 38 inches, top at 54 inches | Near shower door or entry point |
For seniors who are shorter or use a shower chair, placement should lean toward the lower end of each range. Mark your placement with masking tape before drilling so you can step back and check the height visually before making any holes. ADA standards are sourced from ada.gov.
If your parent uses a shower chair, see our how to choose a shower chair for elderly guide for how grab bar and chair placement work together in a fiberglass unit.
Tools and Materials You Need
Before you start, gather everything in one place. You will need a power drill, a standard twist bit or step drill bit sized for your toggle bolts, backing plates, toggle bolts or snap toggles, your grab bar, a level, a pencil, masking tape, a wrench or socket set, safety glasses, and a tube of silicone sealant.
Silicone sealant is essential on fiberglass — it seals each bolt entry point so water cannot get behind the wall and cause rot or mold in the wall cavity. Skipping the sealant is the most common cause of long-term fiberglass wall damage after a grab bar install. Have everything on the bench before you drill a single hole.
Steps 1–5: Prep and Marking for Fiberglass Shower Grab Bar Installation
Step 1: Identify Your Wall Thickness Press the wall firmly with your thumb in the mounting area. If it flexes more than 5mm, the wall is very thin and may need professional assessment. Most modern fiberglass units are firm enough for a backing plate install.
Step 2: Mark ADA Placement Hold the grab bar at the correct ADA height and mark each mounting hole with a pencil. Apply masking tape over each mark in an X pattern. The tape stops the drill bit from skating across the smooth fiberglass surface.
Step 3: Tap the Wall to Find Hollow Spots Knock gently across the wall with your knuckle. A hollow sound means there is an air cavity behind — that is normal for fiberglass. An unusually soft or crumbling feel means the backing material may be damaged. Avoid those areas.
Step 4: Drill Pilot Holes Use a standard twist bit or step bit at low speed. Fiberglass does not need a diamond bit. Apply light steady pressure and let the bit do the work. Stop when the bit breaks through the back face of the fiberglass.
Step 5: Clear the Holes and Check Diameter Wipe fiberglass dust with a dry rag and confirm each hole is the correct diameter for your toggle bolt size. Fiberglass dust is an irritant — wear safety glasses and a dust mask for this step.

Steps 6–10: Backing Plate, Anchoring and Installing Grab Bars for Fiberglass Shower
Step 6: Position the Backing Plate Fold or slide the backing plate through the drill hole so it sits flat against the inside face of the fiberglass wall. For external backing plates, hold the plate flat against the outside shower wall surface aligned with the mounting holes.
Step 7: Thread Toggle Bolts Through the Bar Mount Thread each toggle bolt through the grab bar mounting flange, then through the backing plate if using an external plate method. Fold toggle wings flat and push them through the hole until you feel the wings spring open behind the wall.
Step 8: Align the Bar and Check Level Hold the grab bar in position and confirm it is level before tightening anything. An off-level bar creates uneven stress across both mounting points and feels wrong to grip. Use your level one final time.
Step 9: Tighten Bolts and Apply Sealant Tighten each bolt gradually, alternating between sides. Stop when the mount sits flush with no gap. Apply a thin bead of silicone sealant around each bolt entry point immediately after tightening. Smooth with a wet finger and allow to cure fully before using the shower.
Step 10: Post-Install Safety Test Apply 250 pounds of downward and outward force against the bar. It must not move, flex, wobble, or produce any cracking sounds. Check each mounting point visually for surface stress or hairline cracks. If anything moves, remove the bar and reassess the backing plate fit before reinstalling. Only let your parent use the bar after it passes this test without any movement.
7 Fiberglass-Specific Mistakes to Avoid When Installing Grab Bars

Knowing how to install grab bars in fiberglass shower walls means understanding what damages fiberglass before the bar ever bears real weight.
Mistake 1: Skipping the backing plate. This is the single most dangerous mistake. Without a plate the anchor tears through the thin fiberglass wall under sudden load. No backing plate means no safe install — full stop.
Mistake 2: Using tile anchor methods on fiberglass. Epoxy anchors and masonry bolts are designed for solid walls. Fiberglass has no solid backing to bond to. Tile methods fail on fiberglass every time.
Mistake 3: Drilling too large a hole. A hole larger than the toggle bolt diameter weakens the fiberglass around the entry point. Use the exact drill bit size specified for your toggle bolt and go no larger.
Mistake 4: Overtightening bolts. Fiberglass compresses under point pressure. Overtightening crushes the wall surface around the bolt hole and creates hairline cracks that grow over time. Snug and flush is the goal.
Mistake 5: Skipping silicone sealant. Water gets behind the wall through every unsealed bolt hole. Over months it rots the wall cavity backing and weakens the entire mounting area. Sealant takes 30 seconds and prevents years of damage.
Mistake 6: Installing in a damaged wall section. If the wall feels soft, crumbles at the drill point, or shows existing cracks, it cannot safely hold a grab bar. Call a professional for those walls.
Mistake 7: Skipping the post-install load test. A bar that looks solid can still fail under real weight. The load test is the only confirmation your install is safe for your parent to use.
Pair your new grab bar with non-slip bath mats for elderly to protect the floor just outside the shower entrance.
When to Call a Professional Instead
Some fiberglass situations are beyond a safe DIY install. If the wall is already cracking, soft, or showing water damage at the surface, any drilling will make it worse. Very old fiberglass units — especially those over 20 years old — can be brittle and may crack during drilling even with perfect technique. If pressing the wall firmly causes it to flex more than 5mm, the wall is too thin for a standard backing plate install.
One-piece fiberglass units with unusually thin walls under 3mm should also be assessed by a professional before drilling. Renters should check their lease before making any wall penetrations — some leases require written landlord approval for all drilling. For most modern fiberglass shower units in good condition, this install is well within DIY range with the right tools and patience.
Frequently Asked Questions
Can you install grab bars in a fiberglass shower without a backing plate?
You should not. Without a backing plate, anchors grip only the thin fiberglass layer. Under fall load that layer tears through. A backing plate is non-negotiable for safe fiberglass grab bar installation.
What drill bit do I use for fiberglass?
Use a standard twist bit or step drill bit at low speed. Fiberglass does not require a diamond-tipped bit like porcelain tile does. Match the bit diameter exactly to your toggle bolt size.
How much weight can a grab bar hold in a fiberglass shower?
Backing plate with toggle bolts holds up to 300 pounds in fiberglass when installed correctly. That exceeds ADA requirements and is sufficient for fall-load conditions. The post-install test confirms your specific install reaches that standard.
Do I need silicone sealant around grab bar bolts in fiberglass?
Yes, always. Fiberglass has an air cavity behind the wall. Every unsealed bolt hole lets water into that cavity, causing rot and mold over time. Apply sealant around each bolt immediately after tightening.
How do I know if my fiberglass shower wall is thick enough for grab bars?
Press the wall firmly. If it flexes more than 5mm it may be too thin for a standard install. Tap it — a hollow sound is normal. If the surface feels soft, crumbles, or shows existing cracks, call a professional before drilling.
Conclusion
Installing grab bars in a fiberglass shower is completely safe when you follow the right method. The backing plate is not optional — it is the entire reason a fiberglass install holds under load. After 9 years visiting homes as a Certified Senior Home Safety Specialist, I have seen this one step prevent more falls than any other single safety measure in the bathroom. Take the afternoon, follow every step, run the load test, and give your parent a bar they can trust every single day.
Download your free 9-point Senior Safety Checklist to make sure the rest of the bathroom is just as safe. Our bathroom fall prevention guide covers every layer of fall risk for seniors aging in place.